OVERVIEW
The goal of this project was to create a mechanism to create a kiosk for checkin and sign in. The overall idea was to create an centralized, low-cost system that
would intake as much information as possible, and provide visibility for medical staff versus a traditional walk up method. Media Synthesis (the intake and OCR processing of images), combined with open-source solutioning is a viable intake
mechanism and a means to aggregate low-risk patients. However, there are some human determined elements in parsing data.
Using text completion models, such as ChatGPT (used in this project), parsing made it possible. However, this requires
precise prompt engineering and you do not get the same outcome twice.
The combination of OCR, and, facilitating patient intake would allow medical staff to focus on critical patients.
However, this applied project found that it would increase the patient experience for check in. Criticality is still
human deterministic and requires a large dataset for a classifier or recommendation model.
REQUIREMENTS
I have not included the Serial API that I used to test out Arduino. However, you can use Chrome's Serial API that will allow Arduino to communicate through the Serial Port and your web app to listen.
This tool is platform agnostic. I designed it to work on any system, including Mobile devices. This was built on a Raspberry Pi 4 and Raspberry Pi Touchscreen
UI: JAVASCRIPT AND MUI (REACT JS)
OCR AND PARSING: TESSERACTJS AND CHATGPT
HARDWARE
If you want to build it exactly to my specifications, here is what the finished product looks like:
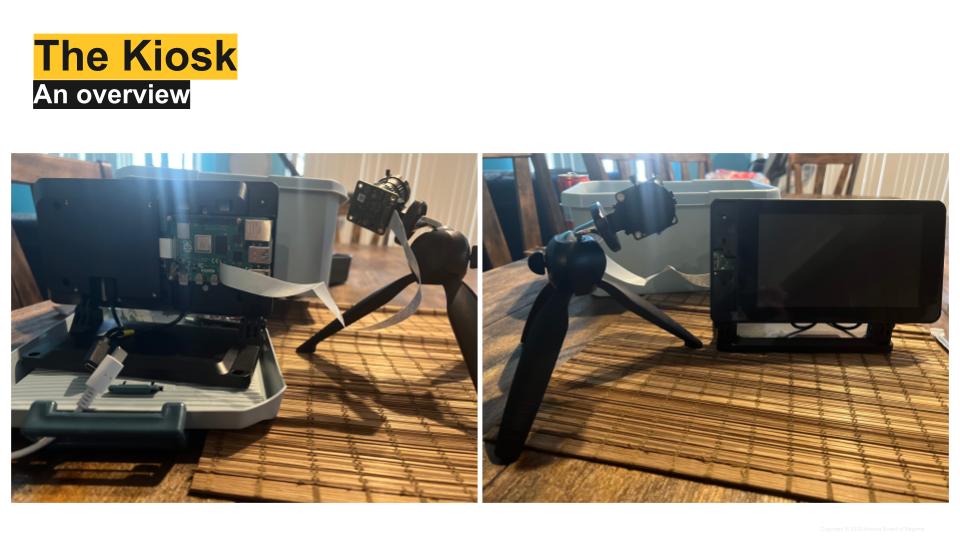
Used is:
- Raspberry Pi 4
- 7 inch touch screen for Raspberry Pi 4
- Raspberry Pi HQ camera
THE SOURCE CODE, PART I
You can also download the source code for the Patient view, because that is where the meat is! I have also included detailed instructions within the readme on how to demo this site.The Patient View Hierarcy
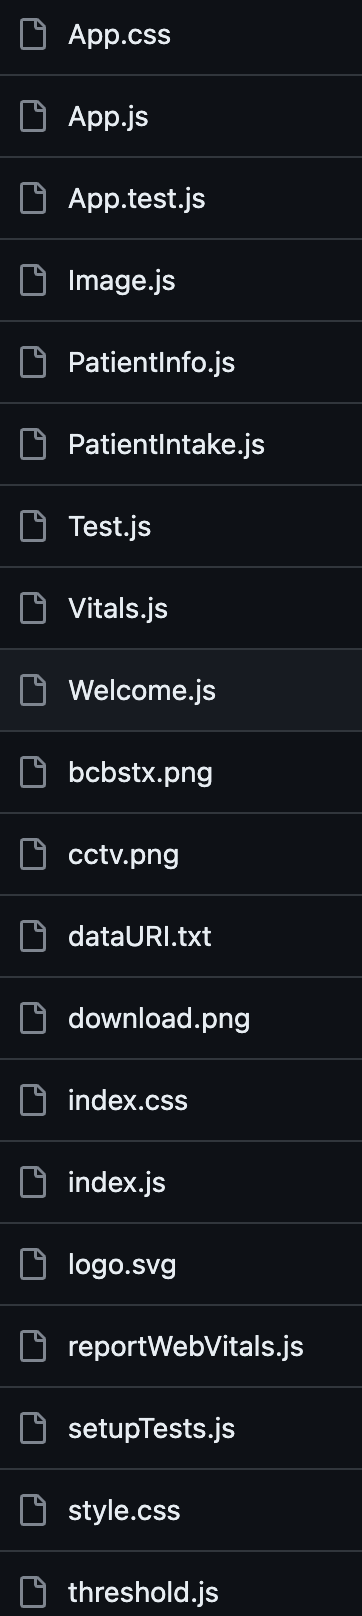
In the next section, I'll walk through three main files that are at the heart of this project: PatientInfo, Image and Vitals
For now, let's just go over what files you see in the /src folder. If you're visual, click here to see a screesnshot.
- App.js: This is the actual front part of the UI. If you're unfamiliar with React, it breaks UIs into smaller components that can be reused and then are rendered. This is the "frame" in which the UI components fit in. This is what is served through index.html
- Welcome.js: Just the welcome component that walks people through the app. It's good UX design to have something that brings context. This is part of Human-Computer Interaction design as well.
- PatientInfo.js: This is where the camera takes a picture. You can use the vanilla javascript here, but since I had P5 running, I thought why not - it's easier. I've credited the source code for this on the file.
- PatientIntake.js: This is for further research into classification machine learning and human deterministic values like patient criticality
- Vitals.js: This code is meant to be integrated later, but it shows how to use the Serial API to read from a Serial Port and then display it.
- Image.js: This takes the image input and runs it through an OCR engine to pull text from images and then asks ChatGPT to parse it into JSON.
I also included a bunch of code snippets, and some dummy images that you can use as controls in your own testing. threshold.js is how you would implement different sorts of filters before passing the canvas to TesseractJS
THE SOURCE CODE, PART II
This section explores the ins and outs ofPatientInfo.js. This has been taken from this great sketch by P5 user Son .
React uses references to the sketch function, hence why it needs to be within the main component. However, we are going to discuss how this function works and how it feeds into Image.js
function sketch (p5) {
p5.setup = () => {
button = p5.createButton('Take Photo').id("button"); //1st: create a button called "snap" and allows for multiple tries
button.mousePressed(takesnap); //when the button is pressed, call the function called "takesnap"
video = p5.createCapture(p5.VIDEO); be sure to ALWAYS CALL p5 because we are creating an instance of this library it needs to be referenced.
video.size(500, 375);}

function takesnap() {
p5.createCanvas(500, 375).id("canvas");
const canvas = document.getElementById("canvas");
p5.image(video, 0, 0, 500, 375); //draw the image being captured on webcam
imageSnap = canvas.toDataURL();
getImageSnap();}} //getImageSnap() is a simple return function
THE SOURCE CODE, PART III
This is a lot going on in Image.js, so lets break it down:
- We are receiving an image from PatientInfo for processing.
- We are then taking that image and if need be applying media processing (I'll talk about that in a second)
- Splitting that image in half
- Passing the deconstructed image to TesseractJS for it to read text from the image
- Returning that text as an array, and setting it as a string.
- Cleaning junk characters from that string. Logos aren't understood, so it's best to try and cover your bases.
- Asking a VERY specific prompt to ChatGPT to complete using the completion API to parse into JSON
- Asking the user confirm and then pushing it.
PHEW that is a lot. I won't go into all of it, because some of it is some human-computer interaction design / UX design but you'll see there are three commented out lines of code.
// img.filter(p5.GRAY)
//p5.image(img, 0, 0)
// for image processing p5.filter(p5.THRESHOLD) --- please refer to the the threshold.js
These are Filters in the P5 code that can help with processing. This is a great tutorial as to why you need preprocessing. But, if it's needed, why don't we use it? Simple: I'm using a very high-def camera with a calibrated exposure. Since there are more pixels, and it's automatically high-res, I don't need to update it. However, since this is supposed to be camera agnostic, there is logic that can be implemented.
THE SOURCE CODE, PART IV TESSERACTJS
FYI THIS SECTION SCROLLS!!We are going to breakdown what is happening in Image.js, specifically this code:
const rectangles = [
{
left: 0,
top: 0,
width: canvas.width/2,
height: canvas.height,
},
{
left: (canvas.width/2),
top: 0,
width: canvas.width/2,
height: canvas.height,
}
];

(async () => {
const worker = await createWorker({
logger: m => setProgress(m.progress*100)
});
await worker.loadLanguage('eng');
await worker.initialize('eng');
await worker.setParameters({
tessedit_char_whitelist: 'ABCDEFGHIJKLMNOPQRSTUVWXYZabcdefghijklmnopqrstuvwxyz/0123456789:',
preserve_interword_spaces: '0'

})
const values = [];
console.log(rectangles.length)

for (let i = 0; i < rectangles.length; i++)
 { const { data: { text } }=await worker.recognize(canvas, { rectangle:
rectangles[i] });
values.push(text.replace(/(\n+)/g, "\n" ).replace(/(1\n|,\n| |,)/g, "" )); //clean up text to remove weird linebreaks }
... //this is just some console.logging
await worker.terminate();
There's a lot to cover! This is from the TesseractJS examples page. This snippet:
- Takes the canvas that we have outlined, and splits it in half. Most insurance cards and identification cards split their data down the middle. Insteaed of the OCR returnning multiple lines of text as one, this makes it easier to read.
- It creates a worker that awaits input and then states that it's going to translate it from english (you can specify other languages) BUT we are just looking for alphanumeric values. Images and logos tend to show up as APPROXIMATIONs of what the model thinks they are.
- For every rectangle (there are two), send back a promise of text that the model identifies.
- Once that's completed, let's remove any extraneous line-breaks or weird symbols that we can recognize
- Terminate the worker or its just going to run randomly.
This is where I would reccomend testing out different images and filters from the P5 library.
Refer to the TesseractJS github page for more examples!There is some logic that is not implemented in this demo that you can use if you're not sure if you need image processing
(async () => {
const worker = await createWorker({
logger: m => setProgress(m.progress*100)
});
This code snippet says once you've created a worker, and you're ready to start working set the progress level based on the response to the API (logger:m). Within m there is a field for confidence. Because the hierarchy of this code is that this resides within the p5 sketch, you can call p5.img within your tesseract function - just as long as you pass the new image to the .recognize call. So, your logic would be (pseudocode wise):
    (async () => {
    const worker = await createWorker({
    logger: m => setConfidence(m.confidence)
    });
    await worker.loadLanguage('eng');
    await worker.initialize('eng');
    await worker.setParameters({
    tessedit_char_whitelist: 'ABCDEFGHIJKLMNOPQRSTUVWXYZabcdefghijklmnopqrstuvwxyz/0123456789:',
    preserve_interword_spaces: '0'

    })
    ...  need something to determine the first pass and what the confidence rate is

        switch confidenceRate

        case x:
            p5 filter
        case y
            p5 filter
        case z
        default:

        for (let i = 0; i < rectangles.length; i++) { const { data: { text } }=await worker.recognize(canvas, { rectangle:
            rectangles[i] }); values.push(text.replace(/(\n+)/g, "\n" ).replace(/(1\n|,\n| |,)/g, "" )); //clean up text to
            remove weird linebreaks } ... //this is just some console.logging await worker.terminate();}
I won't spend too much time on the ChatGPT portion because I actually have to pay for it, it's documented. It's used to parse text and identify key-value pairs to push to a database or for easy reading in case you want to put it into a table.
FURTHER RESEARCH
Vitals.js uses the experimental Chrome API Serial to read a serial port. There isn't much in there, since most of it is based off of an arduino. I couldn't get the quality of data that I thought was valuable but I did create the skeleton of how to display data from the Serial Port.
Models for determining criticality, and start providing suggestions to teach the model.
Want to learn more? Contact me at my website